While shopping for more frames for my son's room I noticed they didn't come with matting like they used to. I buy the 11x13 frames from walmart for $5. So instead of going out to buy 6 sets of matting (which adds up fast inclusing the cost of the frames) I decided to make my own. I also needed matting for the girl's room too. So here is what I used & did.
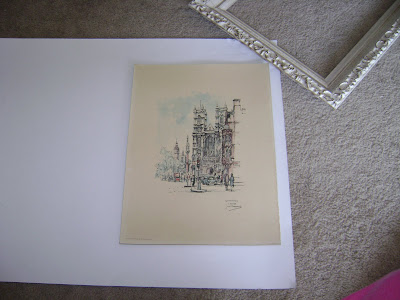
 I took the board backing out (which just happened to be the ugly picture that came in the frame) and traced it onto the poster board. This way I knew it would fit snug and no measuring would be needed.
 One poster board produced 2 mattings.
 I then took my photo, flipped it over and traced it onto the self maden matting.
I layered the matting on top of each other and taped the ends together. I did this to save time by cutting both mattings together. I took the exacto and cut out within the traced square. You want to make sure it has enough space added to cover the edge of the photo you are matting.
 This was what it looks like after. I didn't measure the photo before tracing, I just placed it in the middle. If you are more of a perfectionist you may want to measure first. Then I sprayed adhesive on my matting and added the fabric as I did here in this project. Be sure to spray your adhesive away from the fabric if you are using silky or thin fabric. You don't want wet spots showing on your fabric (which I learned today from experience).
Here is the finished product. I may go back and add ribbon, rhinestones, their names, or anything else later.
So in total the project only cost me $1 for the poster board. I already had everything else on hand.


7 comments:
OMGoodness! That looks like something from Posh Tots. You are really good with those mats and frames and stuff. I love the girlie look. Very nice (in Borat voice LOL). BTW - you MUST get a crock pot. Everybody has them on sale. You can get some good sized ones for less than $20. I am still using mine from college.
Too cute! You are so inspiring with all your pretty DIY projects. Did you paint the princess ribbon over the frames by hand, or is it stickers?
I agree, you must get a crock pot, especially since you have kids. you will love it and wonder what you did without it (i don't have kids, but love the CP and saw your comment on latasha's blog). anyhow, love the frames, and you do not play about ebay!!! the stencil over the photos is really cute, too.
Thanks everyone. And I'm on my crockpot hunt come Monday. The stenciling is wall stickers I got from the dollar tree. Bought them in July. And I had never heard of Posh Tots. I checked them out and am now adding 2 more colors to the girl's room!
Very inspiring!! Thanks for all the step-by-step instructions with pictures....I NEED that!
By the way, thanks for leaving such a nice comment on Bedding Envy. It's so nice to hear from someone else who thinks something as simple as bedding can be eye candy! :)
the frames are from walmart for $5??????? dang...
Hey Adrianna! Thanks so much for stopping by my blog! I am so thankful for your comments! The mirrors you asked about are actually from IMAX, which is a company that sells to Target, Pier 1, Pottery Barn, and more. . . Great idea with the matting, I love saving money!!
Post a Comment